topas
![]() Wt 12 cze, 2007 10:00
Wt 12 cze, 2007 10:00
Wskazowki dla tworcow textur; uzyskane na BiForums od Panow 's8n' i 'skaven' (dziekuje) dotyczace aplikacji Normal Maps na nasze cudne addony. Pierwsza metoda to sposob 's8n'a. Efekty jej uzycia mozna podziwiac w jego jednostkach CSLA.
NORMAL MAPS by s8n
1. download Nvidia Phtoshop plugin
2. I always reedit the BIS textures, from what i have read on biki game will notice the type of texture due the _nohq _smdi prefix, so i dont change it.
3. to create normal map convert your soldiers texture to grayscale (i know this is not the elegant and right way to do it but hey nobody pays me for this and i wont spend 1000 hours on painting whole new grayscale texture from) - run Nvidia filter (play with settings to achieve good bumps similiar to BIS ones) copy that normal map to the default BIS normal (_nohq) texture you can erase the unchanged parts and then merge it to one layer.
4. switch to chanels tab in photoshop - click on rgb chanel copy whole texture, switch to alpha chanel and paste it over it here you can add some height to texture using burn/dodge tools.
save and try it ingame
Hope this helps a bit
btw. here is a nice link about normals etc.
http://www.doom3world.org/phpbb2/viewtopic.php?t=483
A tutaj dotyczaca texturowania broni porada od Skavena (autora RACS Mercenaries)
NORMAL MAPS by SKAVEN
I do my normal maps in photoshop but you may do it inside your 3d software, however I'm not a modeler so I will use only the Photoshop tutorial here and to be honest so far and in my opinion the quality seems to be exactely the same.
First thing to do as I told you is to download my Racs addon and to check how I did the config.cpp (Weapons config.cpp), it's really easy you just have to open two classes as you can see from my file and add the correct name for your mapping class/material as well as the correct names for the texture files, being the first ones the
normal textures:
*****.paa
than the Nvidia mapped textures
*****_nohq.paa
and last the file that gives the amount of colour to the normal map (don't recall the real name of this one but it's not relevant here).
****_smdi.paa the
What I worte above covers everything you need to start on the cpp file and it's pretty easy to do, just be careful while wrighting the config a small mistake on a coma will be enough to won't make it work and you'll take a long time to understand where you made a mistake.
Now the textures themselfes.
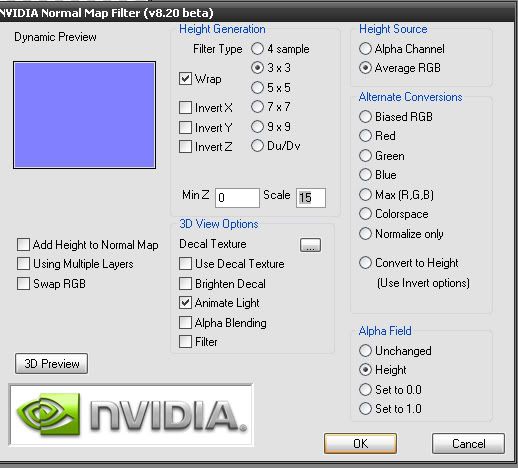
The first thing you will need to do is to download the Nvidia PlugIn and install it inside photoshop than open all the texture files you want to normal map inside photoshop.
Once in Photoshop you have the filters above, inside of it you will have a new one called Nvidia... press it and you will see a new window, inside of which all I do is to change the percentage of normal mapping. Perssonaly I use values between 3 and 10 but you will have to try this one for each weapon (maybe texture) since it does have a lot to do with the type of colours the textures have as well as to how detailed the models are.
It's really try and error here but I would use a value like 5 for my first try. Press enter or apply and you will see your old texture with the normal mapped filter applied now you save it as *****._nohq.paa (just like you did inside the config.cpp file) and you place where you described.
Perssonaly I use a new folder for my normal mapps but this is actually a matter of organization you may not feel the need for it.
Once you applied and saved the normal mapped textures (Nvidia Plugin) you want to make the pink textures (the ones I don't recall the name in English).
So to achieve that you will take one of mine and you will copy the pink colour from one of my them since that's exactely the pink you will need.
Once you did this, now you will again, open the textures as you did at first (or you may just go to history and go a step backwards so you have your textures like they where initially withouht the Nvidia PlugIn).
With this done you will now open a new layer for each texture and paint the layer with the pink you got from my addon (paint the entire layer) once you did this for all the textures you will now give it instead of the usual 100% opacity/transperency you will give it something between 85% and 95%, too much will give less power/colour to the normal map too less will make it shine too much and make it ugly, again you will have to try and error but I say go for 95% on your first try.
Once you did this for all the textures you have to save them*****_smdi.paa (again put this files where you declared on your config). Now open the model INSIDE O2 (not gatebuilder) and normalize (F5) all the lods.
Hopefully if you understood my tutorial (I'm Portuguese and English is my third Language) than it should be working, go try it in game
PS1: At the beggining this may seem complex but in reality it's extremely easy the problem is that a small mistake in the config file or while naming the normal mapped textures won't allow it to work and it will be very hard to spot the problem.
PS2: The values declared inside the config like the power are values that indicate the power/type/light and ammount of normal maps, perssonaly I didn't use them much but I may give you further assistance on this if you need me to.
[/b]
NORMAL MAPS by s8n
1. download Nvidia Phtoshop plugin
2. I always reedit the BIS textures, from what i have read on biki game will notice the type of texture due the _nohq _smdi prefix, so i dont change it.
3. to create normal map convert your soldiers texture to grayscale (i know this is not the elegant and right way to do it but hey nobody pays me for this and i wont spend 1000 hours on painting whole new grayscale texture from) - run Nvidia filter (play with settings to achieve good bumps similiar to BIS ones) copy that normal map to the default BIS normal (_nohq) texture you can erase the unchanged parts and then merge it to one layer.
4. switch to chanels tab in photoshop - click on rgb chanel copy whole texture, switch to alpha chanel and paste it over it here you can add some height to texture using burn/dodge tools.
save and try it ingame
Hope this helps a bit
btw. here is a nice link about normals etc.
http://www.doom3world.org/phpbb2/viewtopic.php?t=483
A tutaj dotyczaca texturowania broni porada od Skavena (autora RACS Mercenaries)
NORMAL MAPS by SKAVEN
I do my normal maps in photoshop but you may do it inside your 3d software, however I'm not a modeler so I will use only the Photoshop tutorial here and to be honest so far and in my opinion the quality seems to be exactely the same.
First thing to do as I told you is to download my Racs addon and to check how I did the config.cpp (Weapons config.cpp), it's really easy you just have to open two classes as you can see from my file and add the correct name for your mapping class/material as well as the correct names for the texture files, being the first ones the
normal textures:
*****.paa
than the Nvidia mapped textures
*****_nohq.paa
and last the file that gives the amount of colour to the normal map (don't recall the real name of this one but it's not relevant here).
****_smdi.paa the
What I worte above covers everything you need to start on the cpp file and it's pretty easy to do, just be careful while wrighting the config a small mistake on a coma will be enough to won't make it work and you'll take a long time to understand where you made a mistake.
Now the textures themselfes.
The first thing you will need to do is to download the Nvidia PlugIn and install it inside photoshop than open all the texture files you want to normal map inside photoshop.
Once in Photoshop you have the filters above, inside of it you will have a new one called Nvidia... press it and you will see a new window, inside of which all I do is to change the percentage of normal mapping. Perssonaly I use values between 3 and 10 but you will have to try this one for each weapon (maybe texture) since it does have a lot to do with the type of colours the textures have as well as to how detailed the models are.
It's really try and error here but I would use a value like 5 for my first try. Press enter or apply and you will see your old texture with the normal mapped filter applied now you save it as *****._nohq.paa (just like you did inside the config.cpp file) and you place where you described.
Perssonaly I use a new folder for my normal mapps but this is actually a matter of organization you may not feel the need for it.
Once you applied and saved the normal mapped textures (Nvidia Plugin) you want to make the pink textures (the ones I don't recall the name in English).
So to achieve that you will take one of mine and you will copy the pink colour from one of my them since that's exactely the pink you will need.
Once you did this, now you will again, open the textures as you did at first (or you may just go to history and go a step backwards so you have your textures like they where initially withouht the Nvidia PlugIn).
With this done you will now open a new layer for each texture and paint the layer with the pink you got from my addon (paint the entire layer) once you did this for all the textures you will now give it instead of the usual 100% opacity/transperency you will give it something between 85% and 95%, too much will give less power/colour to the normal map too less will make it shine too much and make it ugly, again you will have to try and error but I say go for 95% on your first try.
Once you did this for all the textures you have to save them*****_smdi.paa (again put this files where you declared on your config). Now open the model INSIDE O2 (not gatebuilder) and normalize (F5) all the lods.
Hopefully if you understood my tutorial (I'm Portuguese and English is my third Language) than it should be working, go try it in game
PS1: At the beggining this may seem complex but in reality it's extremely easy the problem is that a small mistake in the config file or while naming the normal mapped textures won't allow it to work and it will be very hard to spot the problem.
PS2: The values declared inside the config like the power are values that indicate the power/type/light and ammount of normal maps, perssonaly I didn't use them much but I may give you further assistance on this if you need me to.
[/b]
Ostatnio edytowano Śr 25 lip, 2007 22:53 przez topas, łącznie edytowano 1 raz


